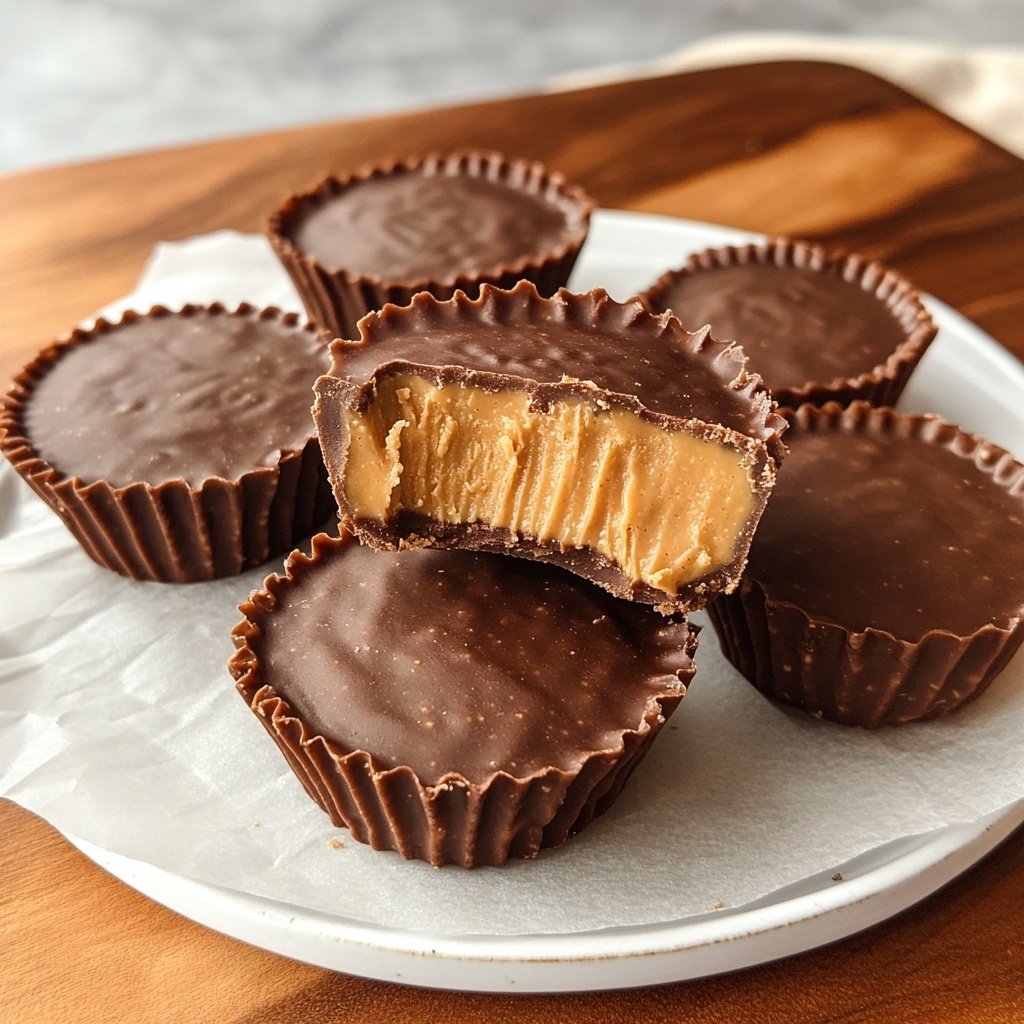
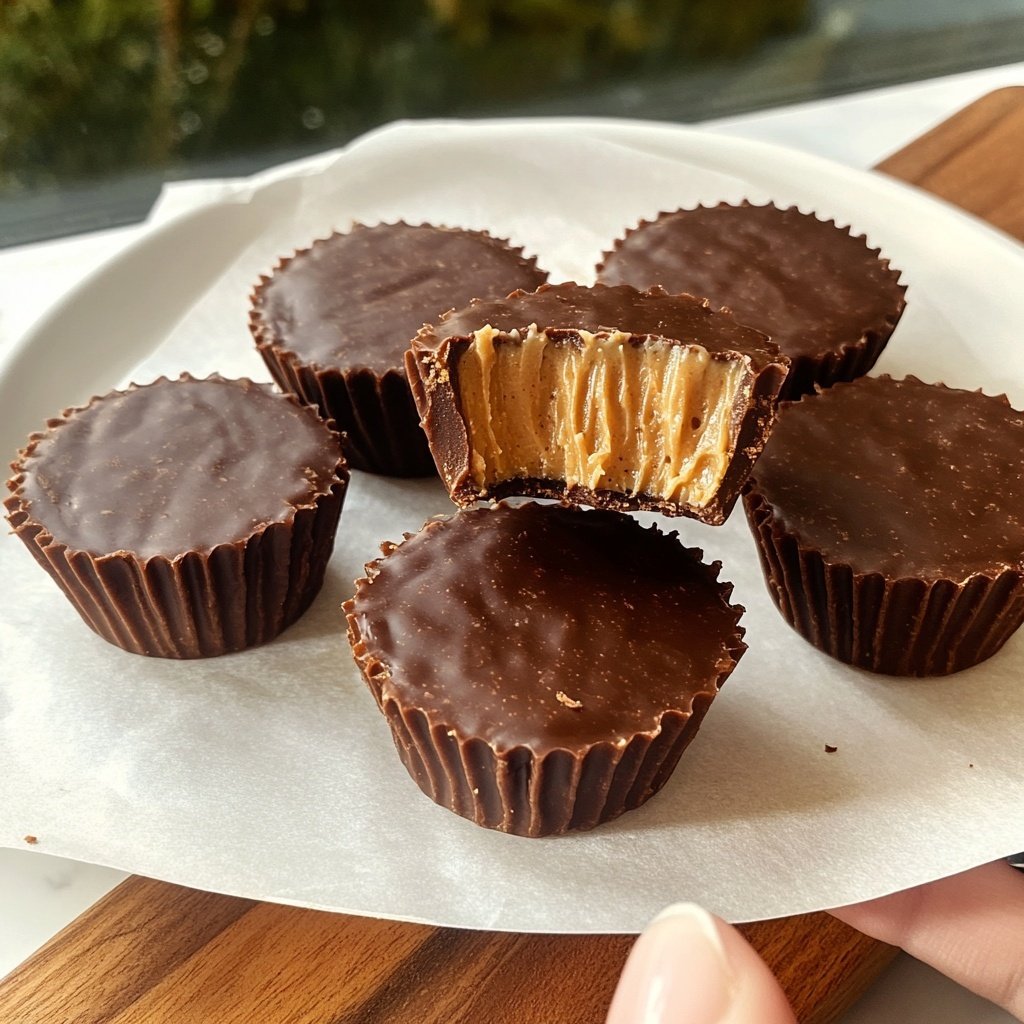
Homemade Peanut Butter Cups with Maple Filling
Highlighted under: Baked Meals
I love making these homemade peanut butter cups with a twist of maple filling. They satisfy my sweet tooth while offering an indulgent taste that beats store-bought treats every time. The creamy peanut butter paired with the hint of maple syrup creates a rich flavor that’s absolutely delightful. Plus, making them at home means I can control the ingredients and satisfy my cravings without the guilt. They’re perfect for any occasion or just a simple afternoon snack, and trust me, once you try them, you'll never look back!
When I first tried making homemade peanut butter cups, I was skeptical. How could something so simple be as good as the ones from the store? But I quickly realized that combining quality ingredients makes all the difference. I chose rich dark chocolate and pure maple syrup for an irresistible filling, creating a depth of flavor that supermarket versions just can't replicate.
One of my best tips is to let the chocolate cool slightly before dipping the cups—this helps to prevent melting the filling. The delightful contrast of textures and flavors is something you need to experience. These cups will become a hit at any gathering, or even just for your own personal snacking pleasure!
Why You'll Love This Recipe
- Rich peanut butter flavor perfectly balanced with sweet maple
- Smooth chocolate coating that crunches beautifully
- Customizable with different nut butters or fillings
Perfecting the Chocolate Cup Technique
Getting the chocolate coating just right is crucial for a great texture and taste. When melting the chocolate chips, do so in a microwave at half power to prevent scorching. Heat in 30-second intervals, stirring after each until glossy and smooth. If the chocolate gets too thick, add a teaspoon of coconut oil to thin it out without compromising flavor. This technique ensures a nice, even coating on your cups.
After pouring the chocolate into the liners, take care to spread it evenly up the sides using the back of a spoon. Make sure to leave enough room for the peanut butter and maple filling layers. If you notice any gaps or thin spots after adding the filling, you can always cover them with additional melted chocolate before refrigerating. The key is to create a sturdy base that holds up when you bite into these decadent cups.
Variations and Substitutions
If you're looking to switch up the flavors, consider using different nut butters for the peanut butter layer. Almond butter or cashew butter can provide a unique twist while still complementing the sweet maple filling. Just be mindful of the consistency; a thicker nut butter might require a bit more powdered sugar to achieve the same texture as creamy peanut butter.
For a vegan option, opt for dairy-free chocolate chips and replace the coconut oil with a plant-based butter. Additionally, ensure that the maple syrup is certified vegan. These adjustments make this treat accessible for a broader audience while maintaining the original indulgence. You can also experiment with flavored extracts, like maple or almond, to infuse your cups with an extra layer of flavor.
Ingredients
For the Cups
- 1 cup dark chocolate chips
- 1 cup creamy peanut butter
- 1/2 cup powdered sugar
- 1 teaspoon vanilla extract
- 1/4 teaspoon salt
For the Maple Filling
- 1/3 cup pure maple syrup
- 1/4 cup coconut oil (melted)
- 1/4 cup powdered sugar
- 1 teaspoon vanilla extract
Make sure to adjust the ingredients based on your preference for sweetness or creaminess.
Instructions
Prepare Chocolate Cups
Melt the dark chocolate chips in a microwave-safe bowl, heating in 30-second intervals until smooth. Spoon about 1 tablespoon into the bottom of each cupcake liner and spread it to cover the sides.
Make the Peanut Butter Layer
In another bowl, mix peanut butter, powdered sugar, vanilla extract, and salt until well combined. Drop a spoonful of this mixture into each lined cup, pressing down gently.
Prepare Maple Filling
In a bowl, whisk together the melted coconut oil, maple syrup, powdered sugar, and vanilla extract until smooth. Pour a tablespoon of the maple mixture over the peanut butter layer in each cup.
Seal with Chocolate
Top each cup with the remaining melted chocolate, ensuring the maple layer is fully covered. Refrigerate the cups for at least 10 minutes to set completely.
Serve
Once set, gently peel away the liners and enjoy your homemade peanut butter cups with maple filling!
Store any leftovers in an airtight container in the refrigerator.
Pro Tips
- Feel free to customize these cups by adding a pinch of sea salt on top for an extra flavor dimension, or try different nut butters for a unique twist.
Storage and Shelf Life
These homemade peanut butter cups can be stored in an airtight container in the refrigerator for up to two weeks. This keeps them firm and ensures that the chocolate retains its texture. If you prefer a softer consistency or plan to savor them over a longer period, consider storing them in the freezer. Just be sure to allow them to thaw for about 10-15 minutes at room temperature before enjoying.
When freezing, you may want to layer parchment paper between cups to prevent them from sticking. This will help maintain their shape and avoid a messy situation when you're craving a sweet snack. They can be stored in the freezer for up to three months, making them a great make-ahead treat for special occasions or just as a little indulgence any time you need a pick-me-up.
Troubleshooting Common Issues
If your chocolate isn't adhering well to the peanut butter layer after refrigeration, it may be too thick or not melted properly. To fix this, gently reheat the chocolate, adding a splash of coconut oil to regain its smooth consistency before topping off your cups. Make sure to spoon enough melted chocolate over the filling to create a solid seal, preventing the maple filling from oozing out when you take a bite.
Should your peanut butter layer be too crumbly or dry, consider adding a bit more coconut oil or a touch of maple syrup to achieve the desired spreadability. The balance of creaminess to sweetness is vital, so adjust slowly, mixing thoroughly and testing until you create the perfect filling that complements the chocolate.
Questions About Recipes
→ Can I use milk chocolate instead of dark chocolate?
Yes, you can use milk chocolate if you prefer a sweeter flavor.
→ Are these peanut butter cups suitable for vegans?
They can be made vegan by ensuring the chocolate and coconut oil are dairy-free.
→ How long can I store these cups?
They can be stored in the refrigerator for up to a week.
→ Can I freeze these peanut butter cups?
Yes, they freeze well. Just make sure to store them in an airtight container.
Homemade Peanut Butter Cups with Maple Filling
What You'll Need
For the Cups
- 1 cup dark chocolate chips
- 1 cup creamy peanut butter
- 1/2 cup powdered sugar
- 1 teaspoon vanilla extract
- 1/4 teaspoon salt
For the Maple Filling
- 1/3 cup pure maple syrup
- 1/4 cup coconut oil (melted)
- 1/4 cup powdered sugar
- 1 teaspoon vanilla extract
How-To Steps
Melt the dark chocolate chips in a microwave-safe bowl, heating in 30-second intervals until smooth. Spoon about 1 tablespoon into the bottom of each cupcake liner and spread it to cover the sides.
In another bowl, mix peanut butter, powdered sugar, vanilla extract, and salt until well combined. Drop a spoonful of this mixture into each lined cup, pressing down gently.
In a bowl, whisk together the melted coconut oil, maple syrup, powdered sugar, and vanilla extract until smooth. Pour a tablespoon of the maple mixture over the peanut butter layer in each cup.
Top each cup with the remaining melted chocolate, ensuring the maple layer is fully covered. Refrigerate the cups for at least 10 minutes to set completely.
Once set, gently peel away the liners and enjoy your homemade peanut butter cups with maple filling!
Extra Tips
- Feel free to customize these cups by adding a pinch of sea salt on top for an extra flavor dimension, or try different nut butters for a unique twist.
Nutritional Breakdown (Per Serving)
- Calories: 260 kcal
- Total Fat: 20g
- Saturated Fat: 9g
- Cholesterol: 0mg
- Sodium: 125mg
- Total Carbohydrates: 25g
- Dietary Fiber: 2g
- Sugars: 15g
- Protein: 5g